

♣
There are plenty of awesome foodie blogs out there. Guess what? Mine’s not one of them.
I have as much patience for a camera in the kitchen as I do for kids underfoot in the kitchen. In a couple of months, my current kitchen will be ripped out for a new design, one that has more working and walking space. Until then, my under-designed-but-beautiful kitchen leaves me in no state of mind to juggle another thing.
But to my surprise, there are practically zero nut milk or tofu-making posts on WordPress. Perhaps I’m the odd one out; how could so few people be doing this? Nut milks are super-duper easy to make at home, cheaper to make yourself, and they bode well for a vegan, vegetarian, or any food diet.
All that was needed was the right appliance to get the show on the road, though I already knew the process could be done entirely stove top. Originally as an experiment to avoid purchasing a certain non-recyclable container, milk-making became the norm when we ditched dairy entirely.
No boob or pump — certainly not a cow’s boob or pump! — is even required.
Enjoy this photo how-to on how to make soy milk (or subsequently, tofu). If I can do it, you can do it.
Happy Tofu and Milk Making!
♣
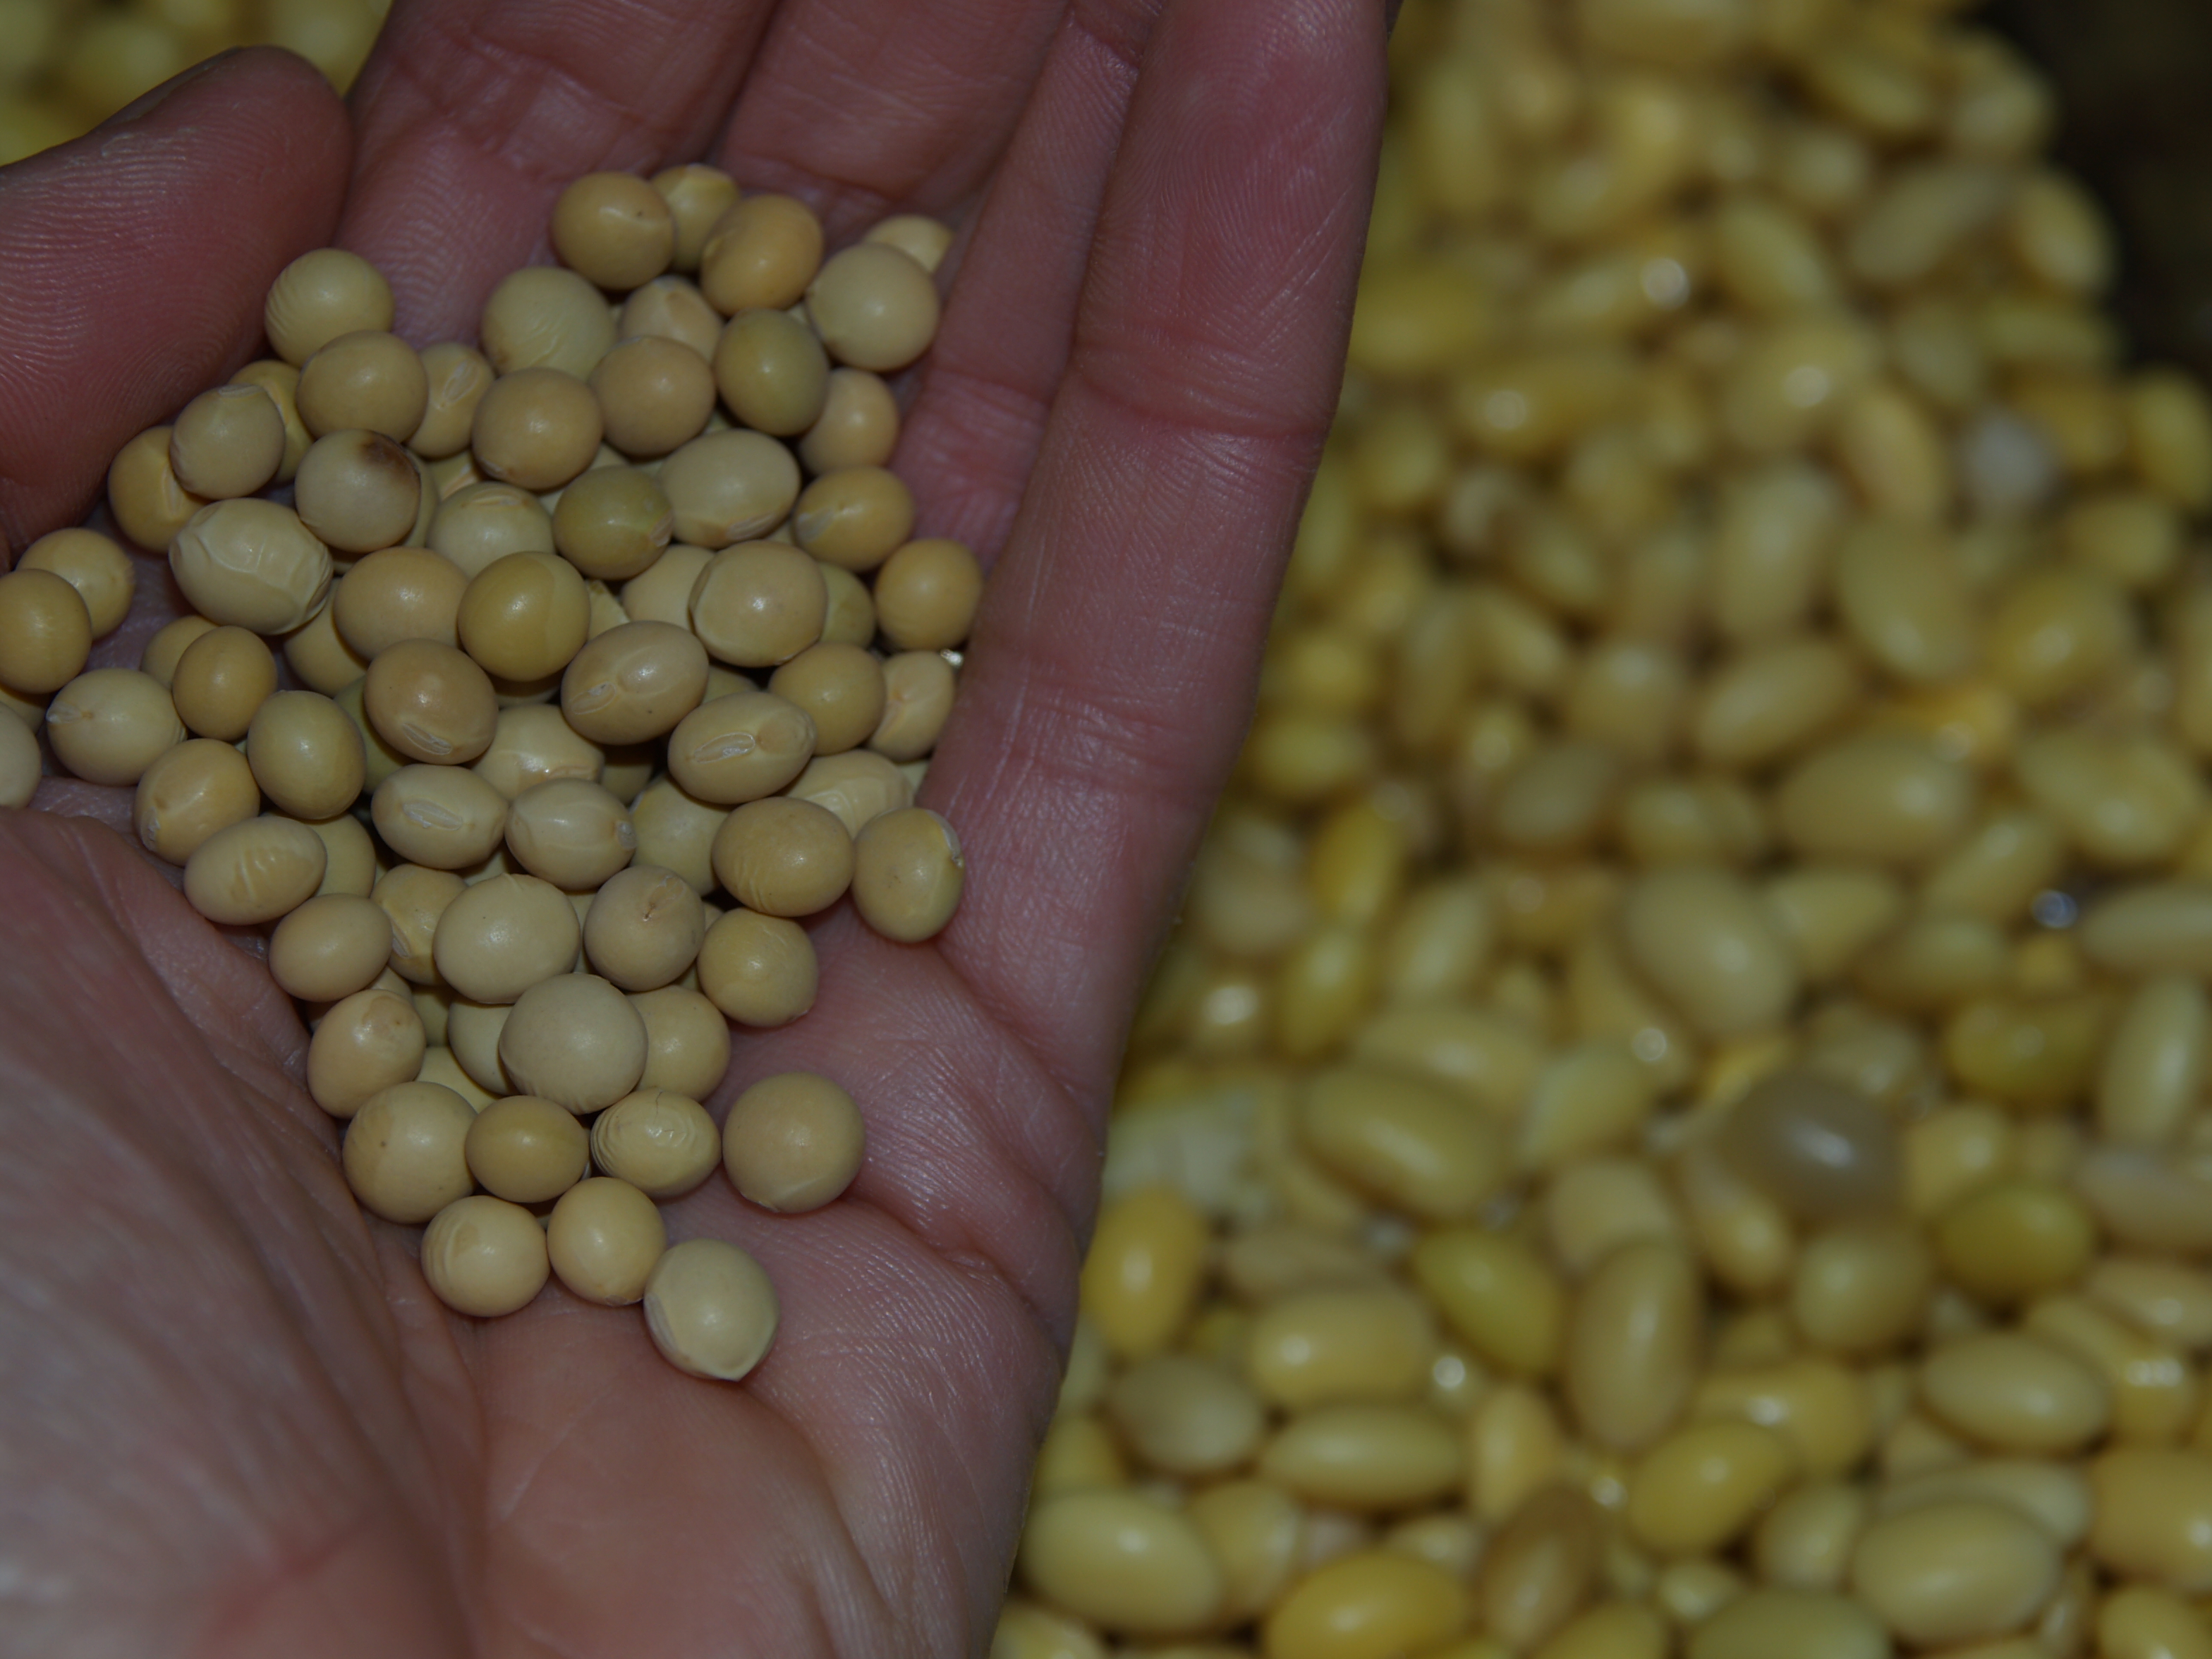
Get Your Supplies
As I’m making milk then tofu, I need:
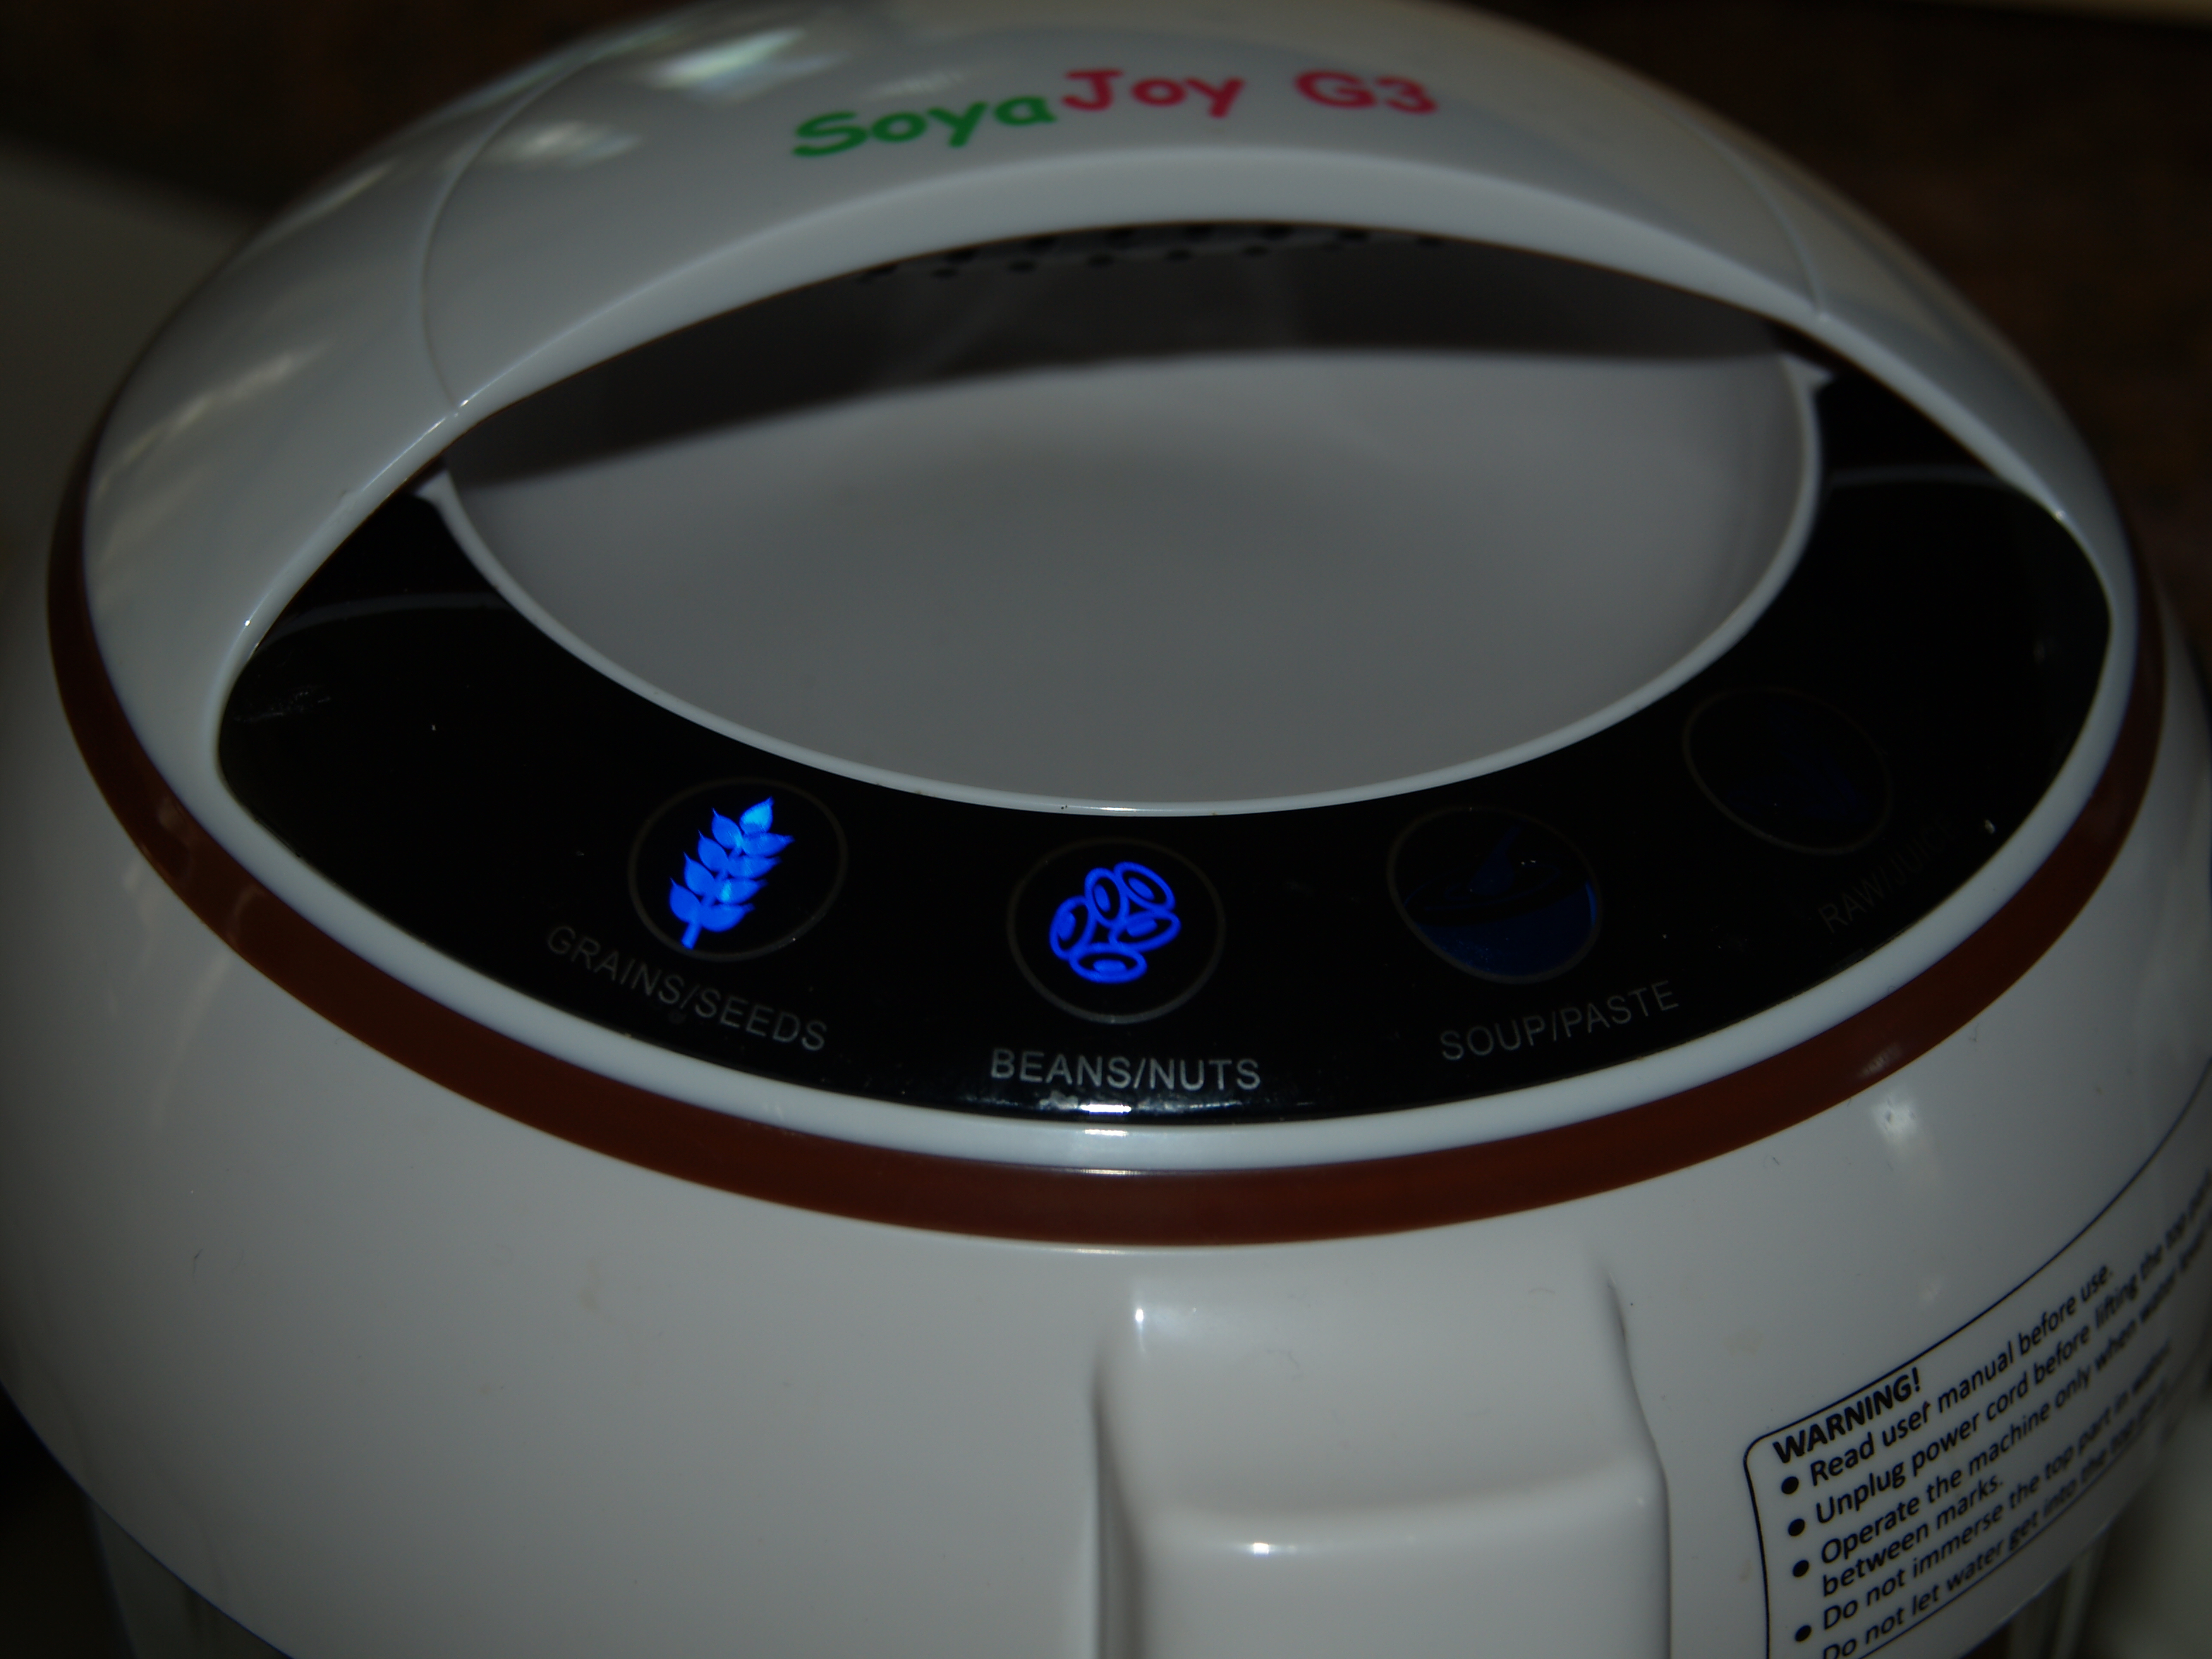
- Soyajoy G3 soy milk maker
- soaked soybeans (soak 8 hours to overnight)
- container and pulp strainer
- 4-quart pan and thermometer
- tofu press, cheesecloth, and nigari (coagulant)

Start It Up!!
One cup of dried soybeans makes a 1-lb block of tofu; I will need to prepare two batches of milk for that. To make only a quart of soy milk for the fridge, soak only 1/2 cup dried soybeans.
Half of the soaked soybeans go into the pot, fill to the mark stamped on the container with drinking water, and plug in the unit. Press the little blue button “beans/nuts” (in case there’s confusion).
The Waiting Is The Hardest Part
For 20 minutes, go do something else in the vicinity. Piddle with your blog, play a game of Scrabble, watch birds, or eat vegan macaroons. You may even want to hum the Tom Petty tune that is now stuck in my head.
Strain the Pulp
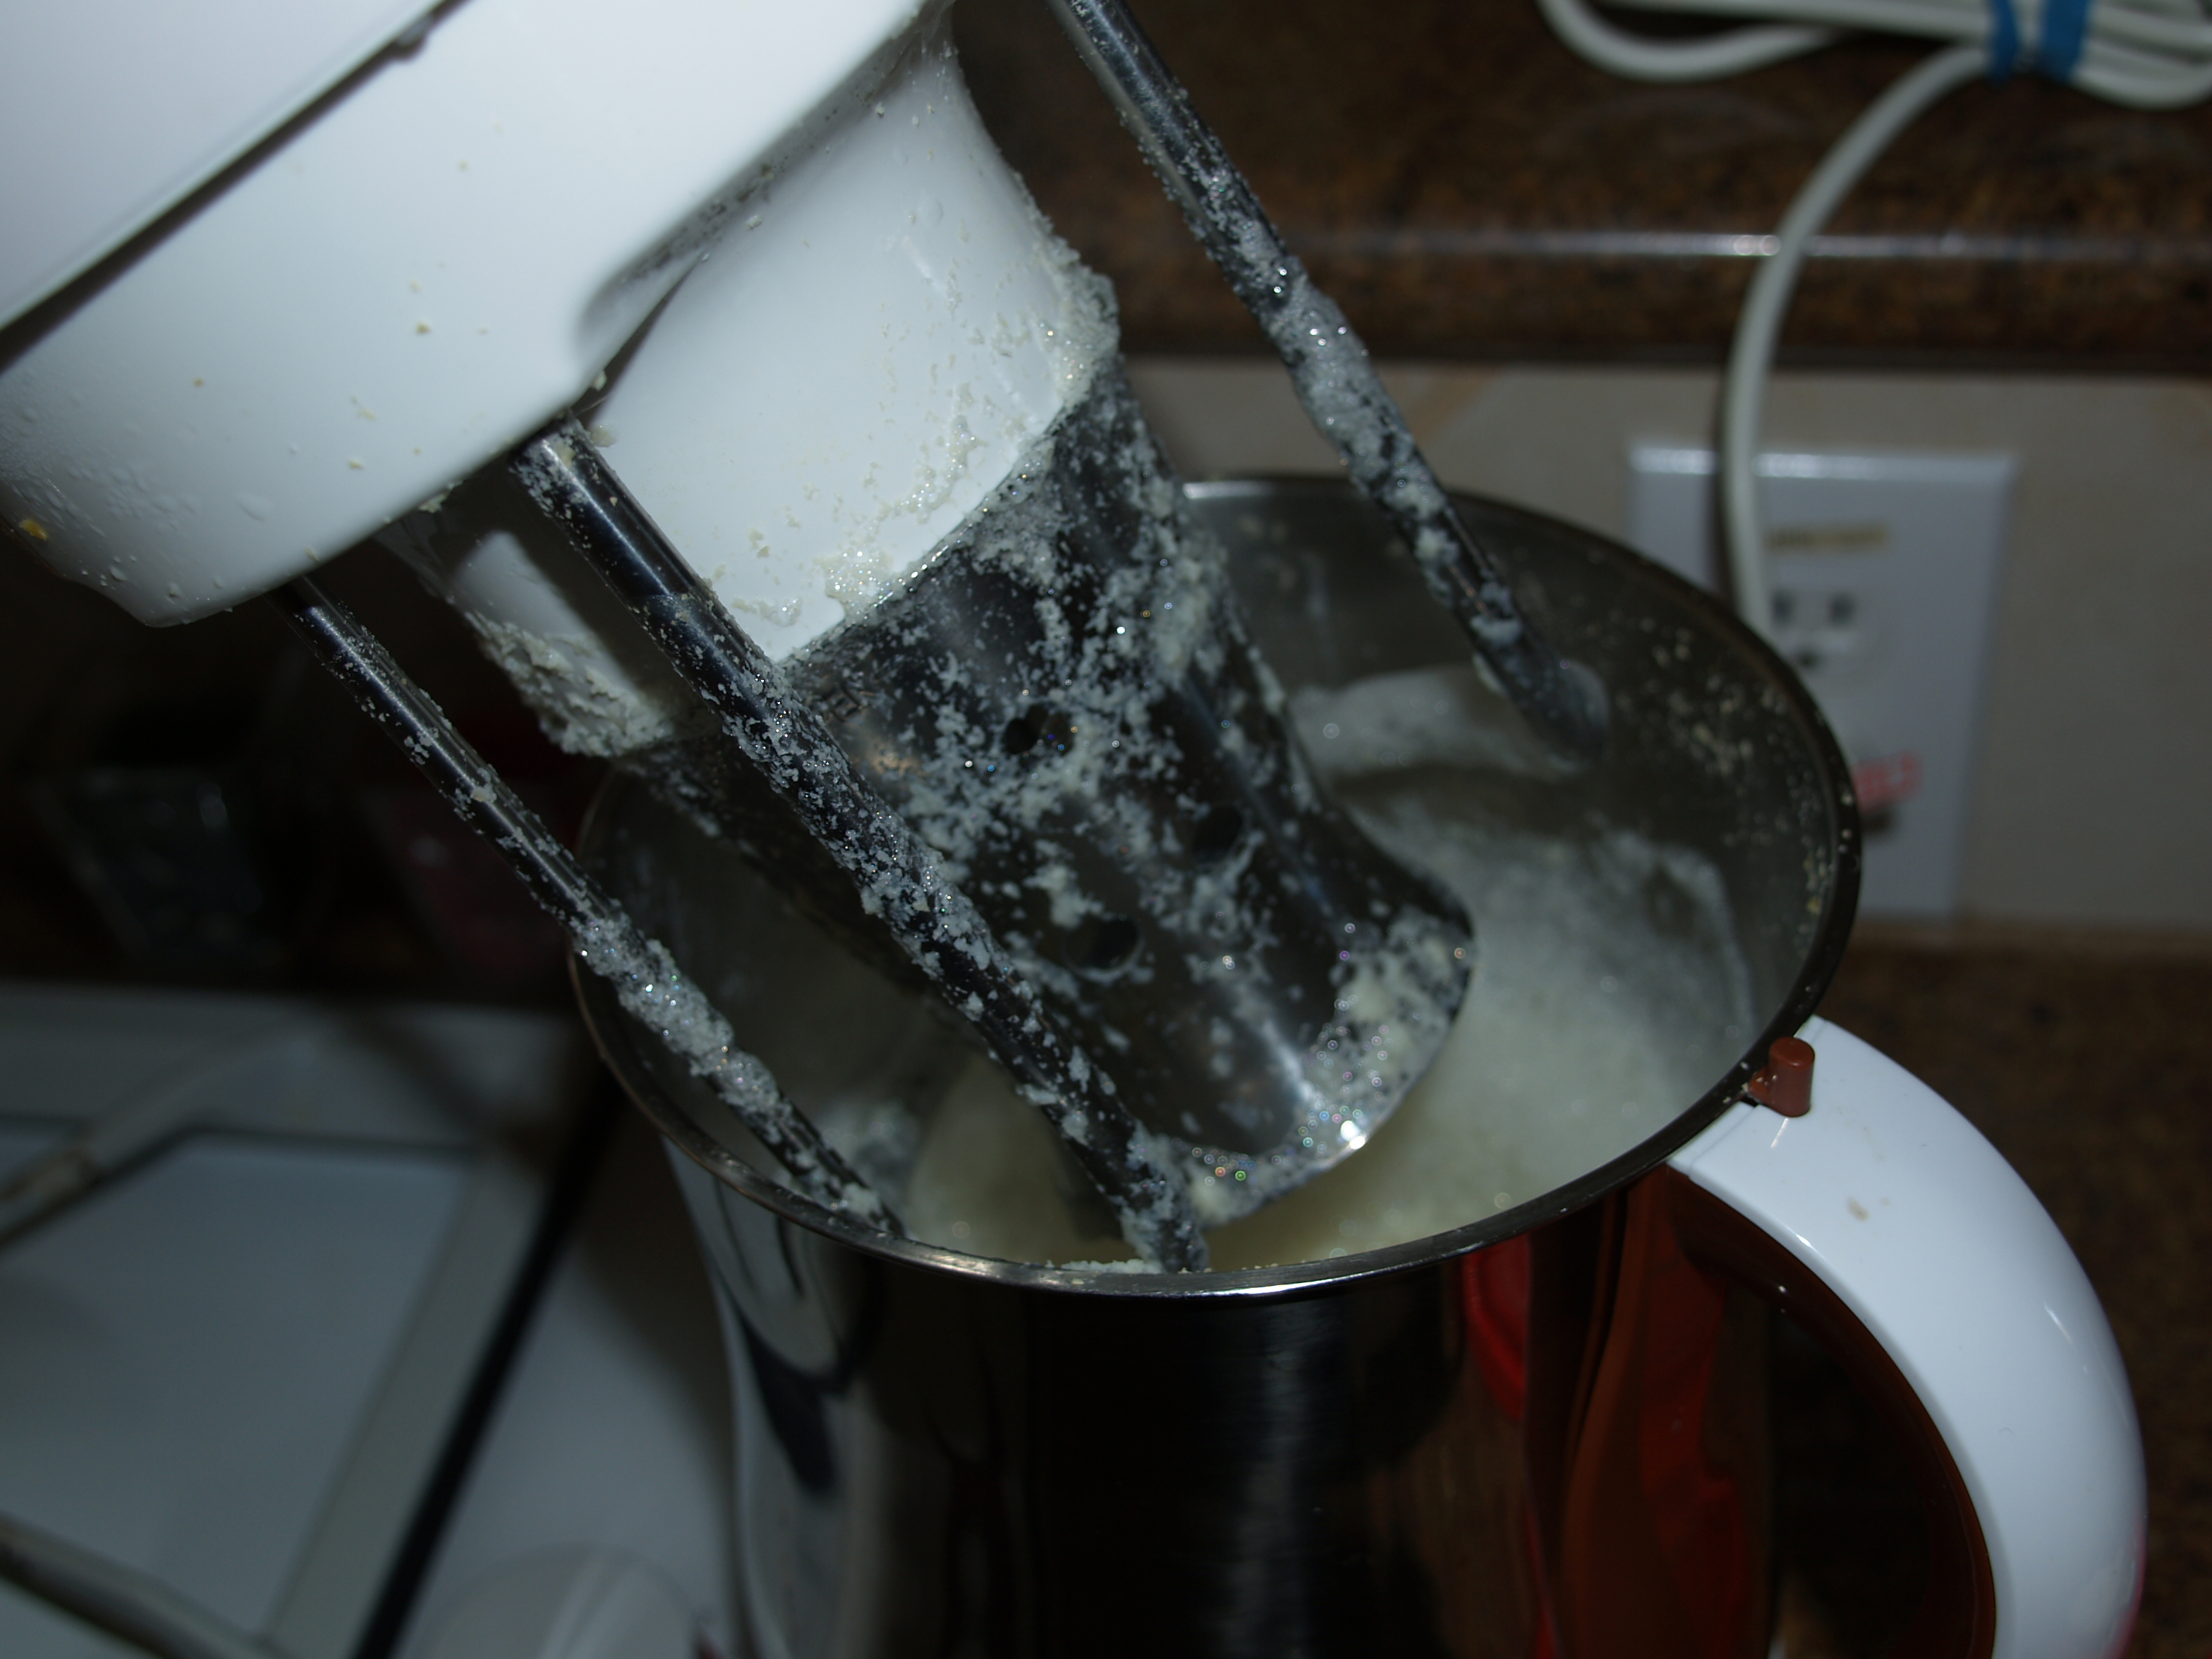
When the unit ‘beeps’ at you, the batch is complete. Remove the power cord and carefully lift the unit out from the container. IT WILL BE VERY HOT. Pour the contents into the strainer that fits nicely over the pitcher provided to remove the okara (oh-KAH-rah) — soybean pulp — from the milk.
Do not discard! This will be used later for other yummy goodies (like brownies). You’ll want to press out as much of the milk from the pulp as you can. The pulp keeps longer the drier it is, and you’ll get another cup’s worth in this process.


Decisions, Decisions: Milk or Tofu?
If it’s milk you want, pour what you made into fridge to chillax. Clean up for next time.
OR…
Make a second batch of milk and move on to tofu-making, Baby!
Let’s Make Tofu!
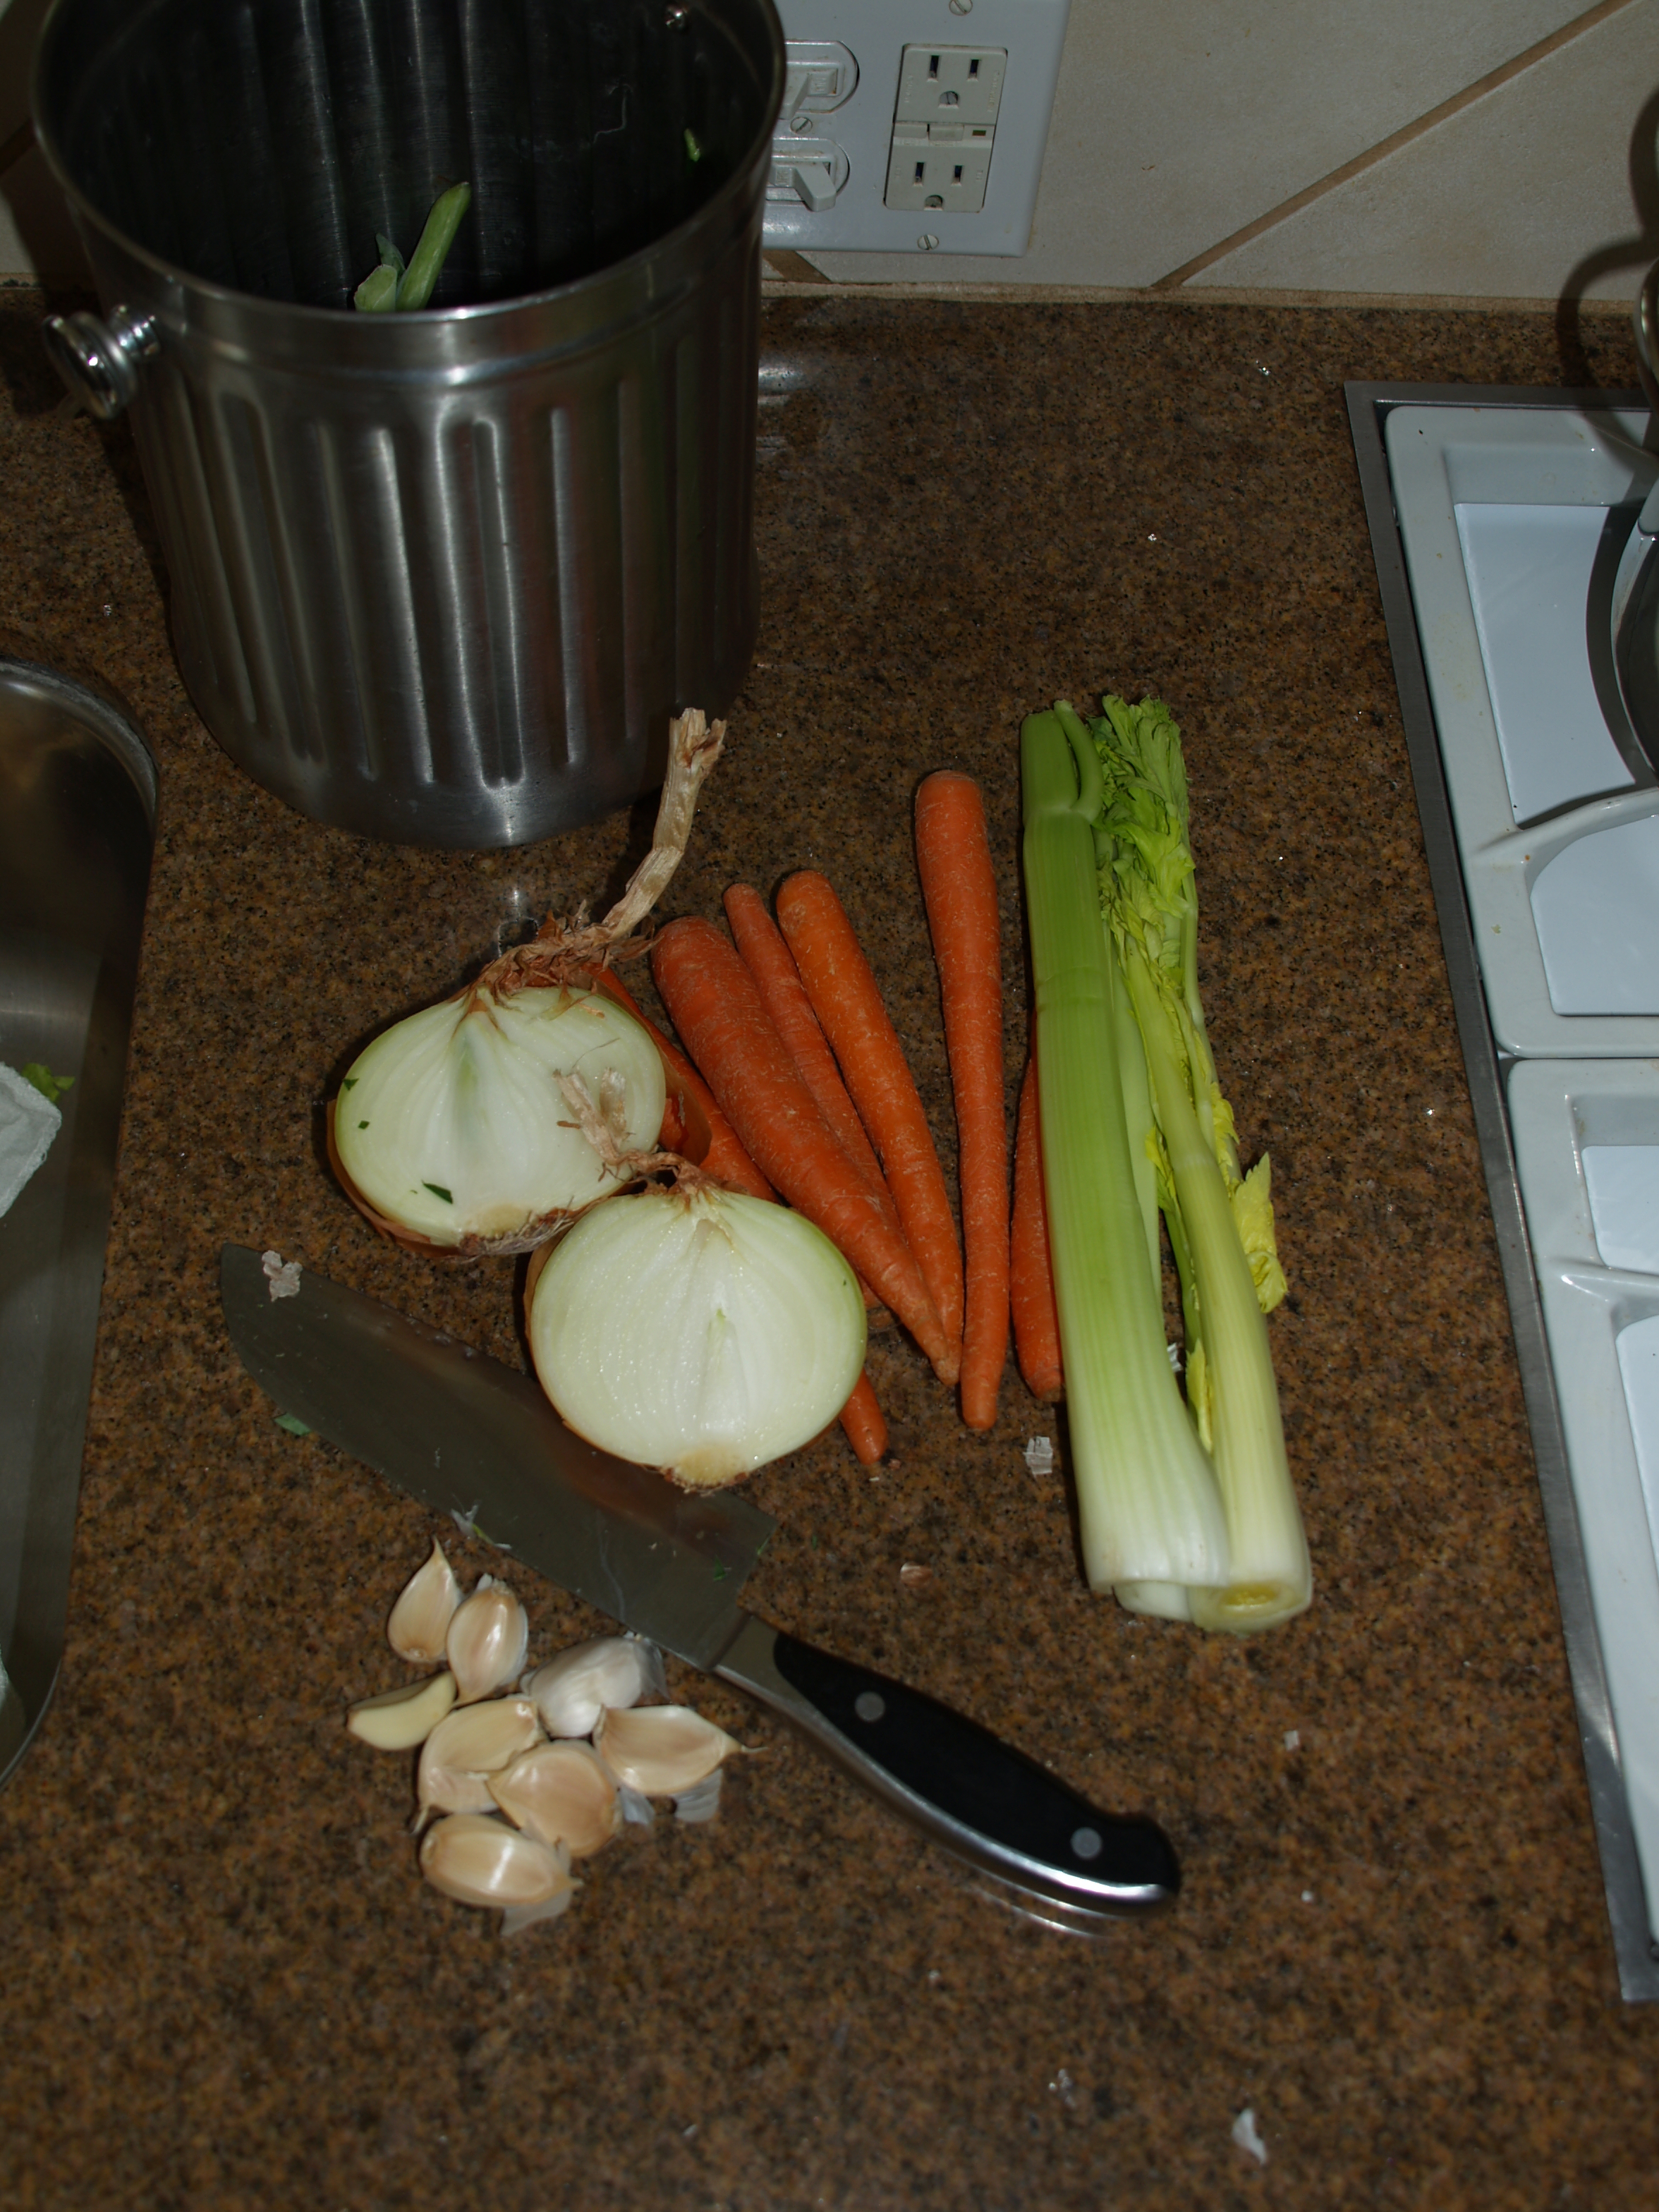
While the second batch is brewing, multi-task with another meal, say, some vegetable broth. Broth is an essential component of miso soup, it flavors sauteed greens without fat, and can be used to bulk up many-a-meal, Miso soup is nothing more than broth, tofu, miso paste, chives and mushrooms, heated with spinach wilted on top.
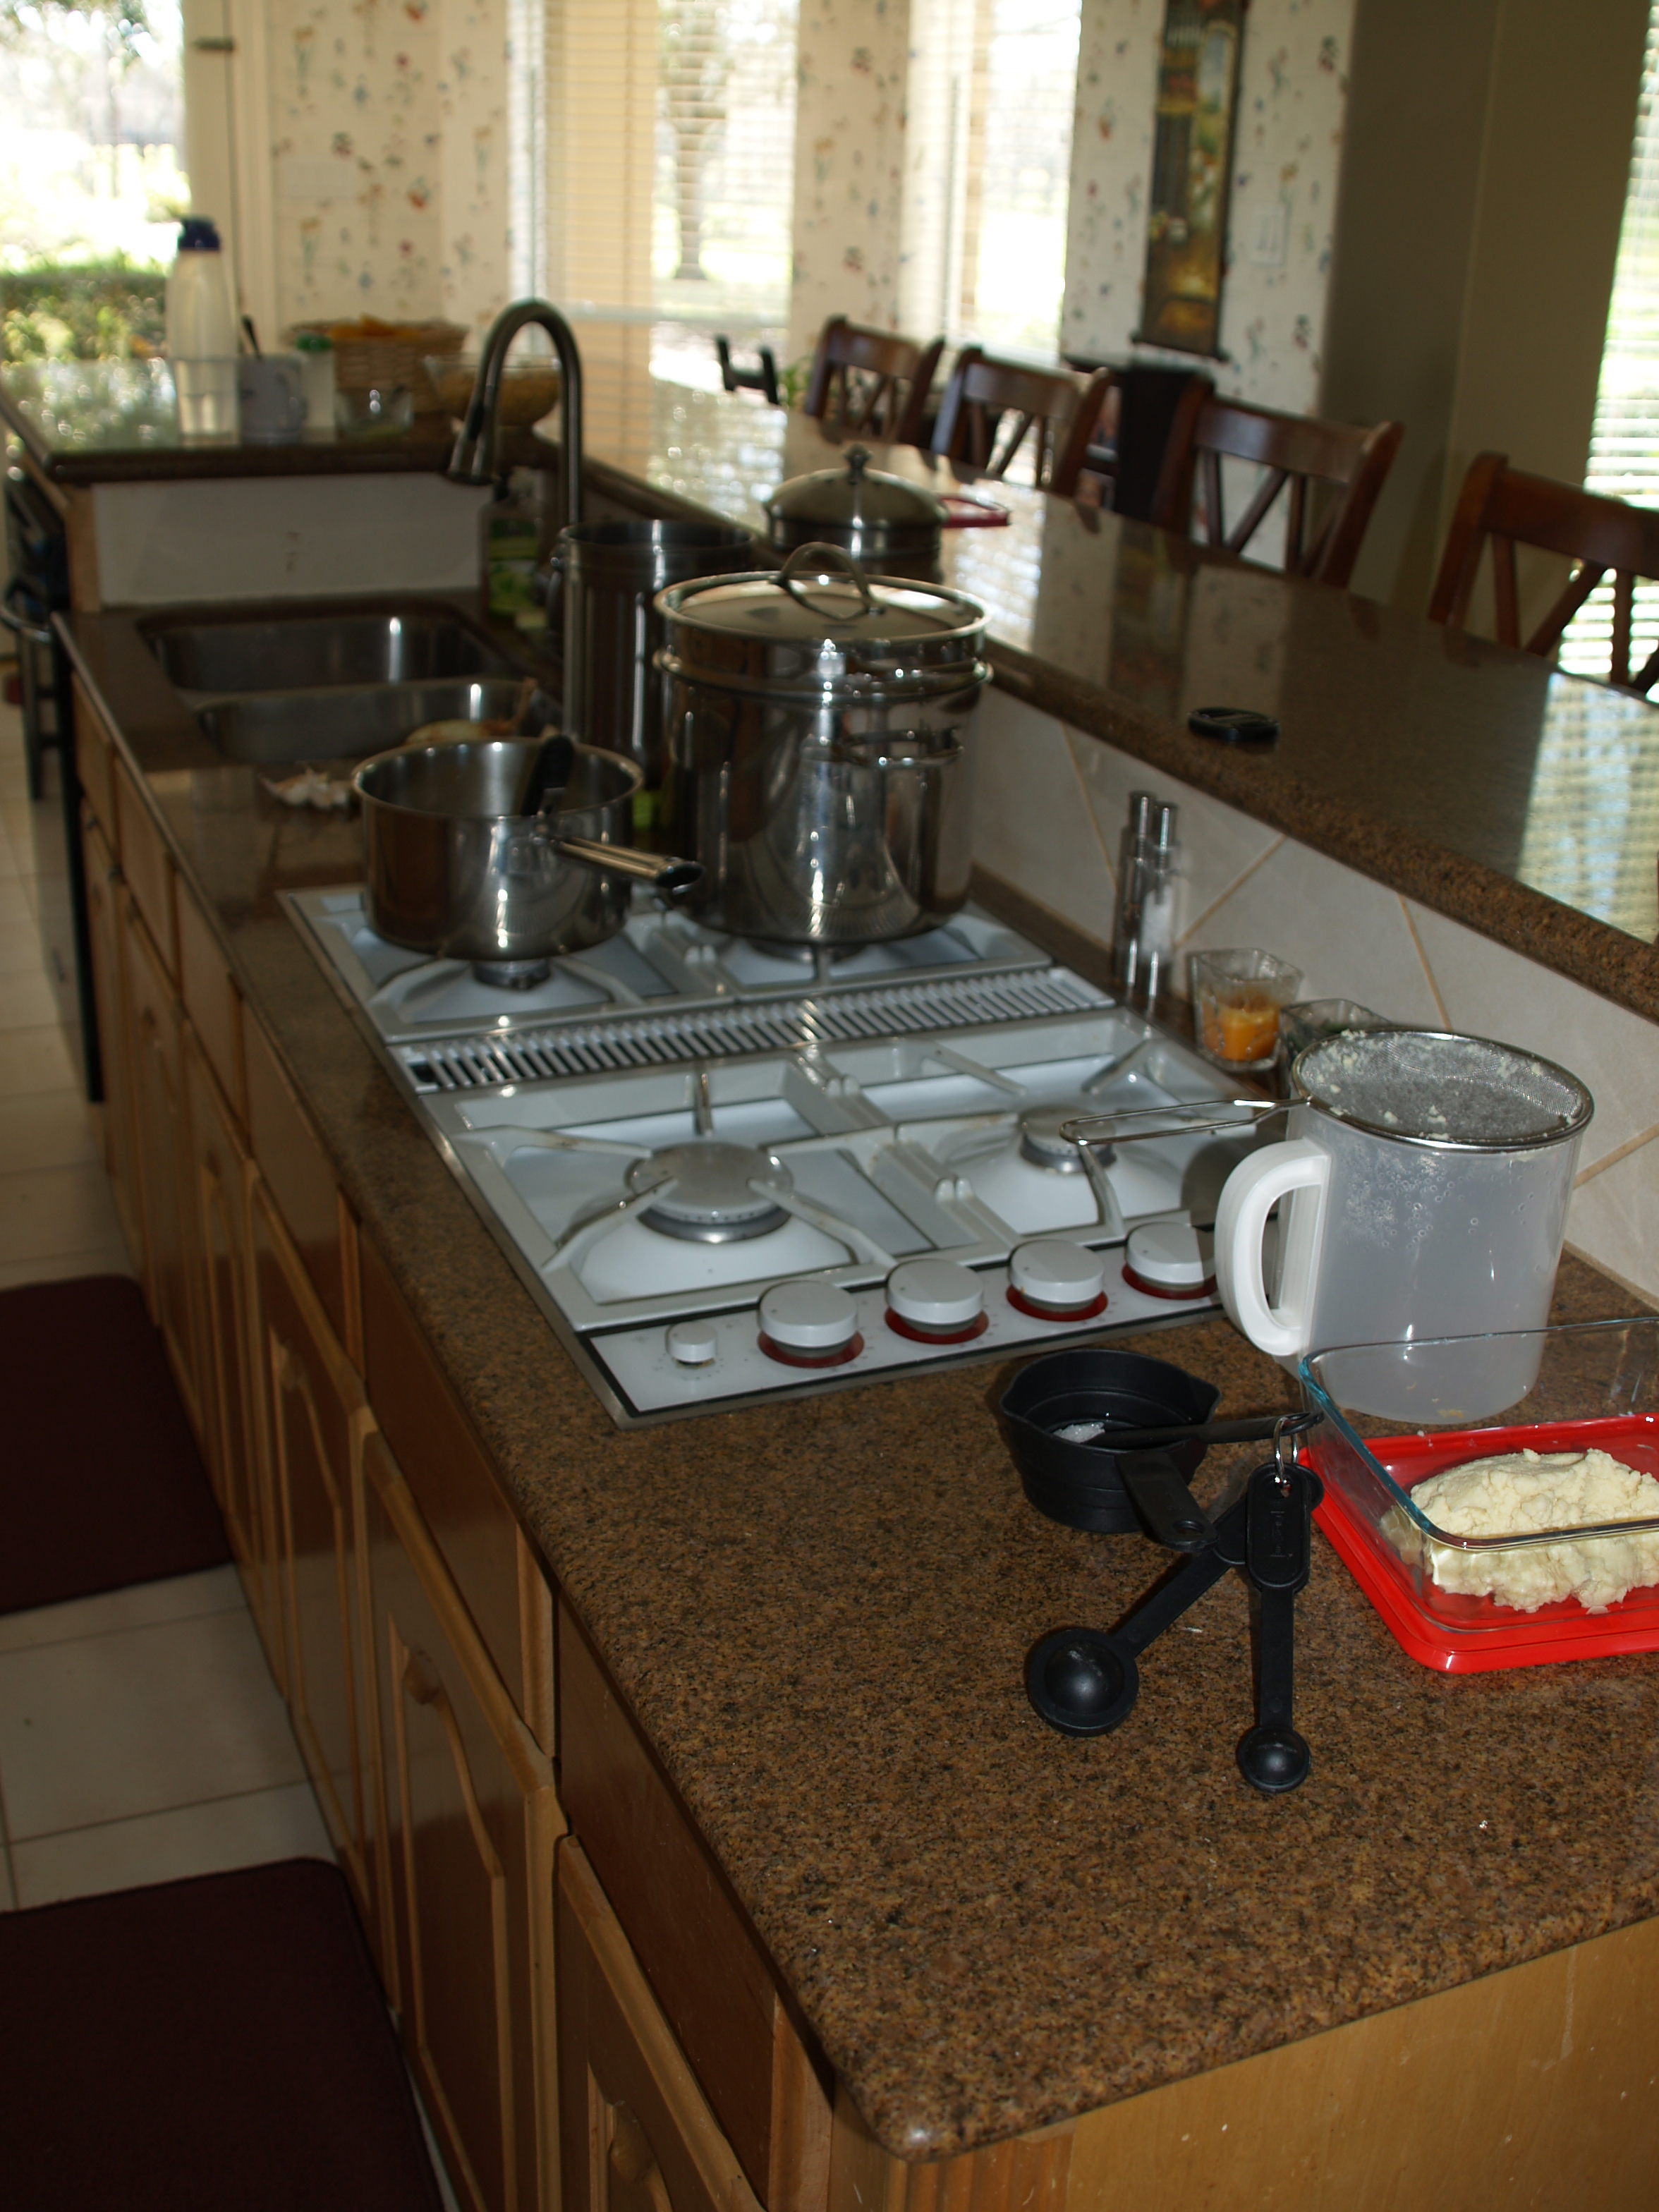
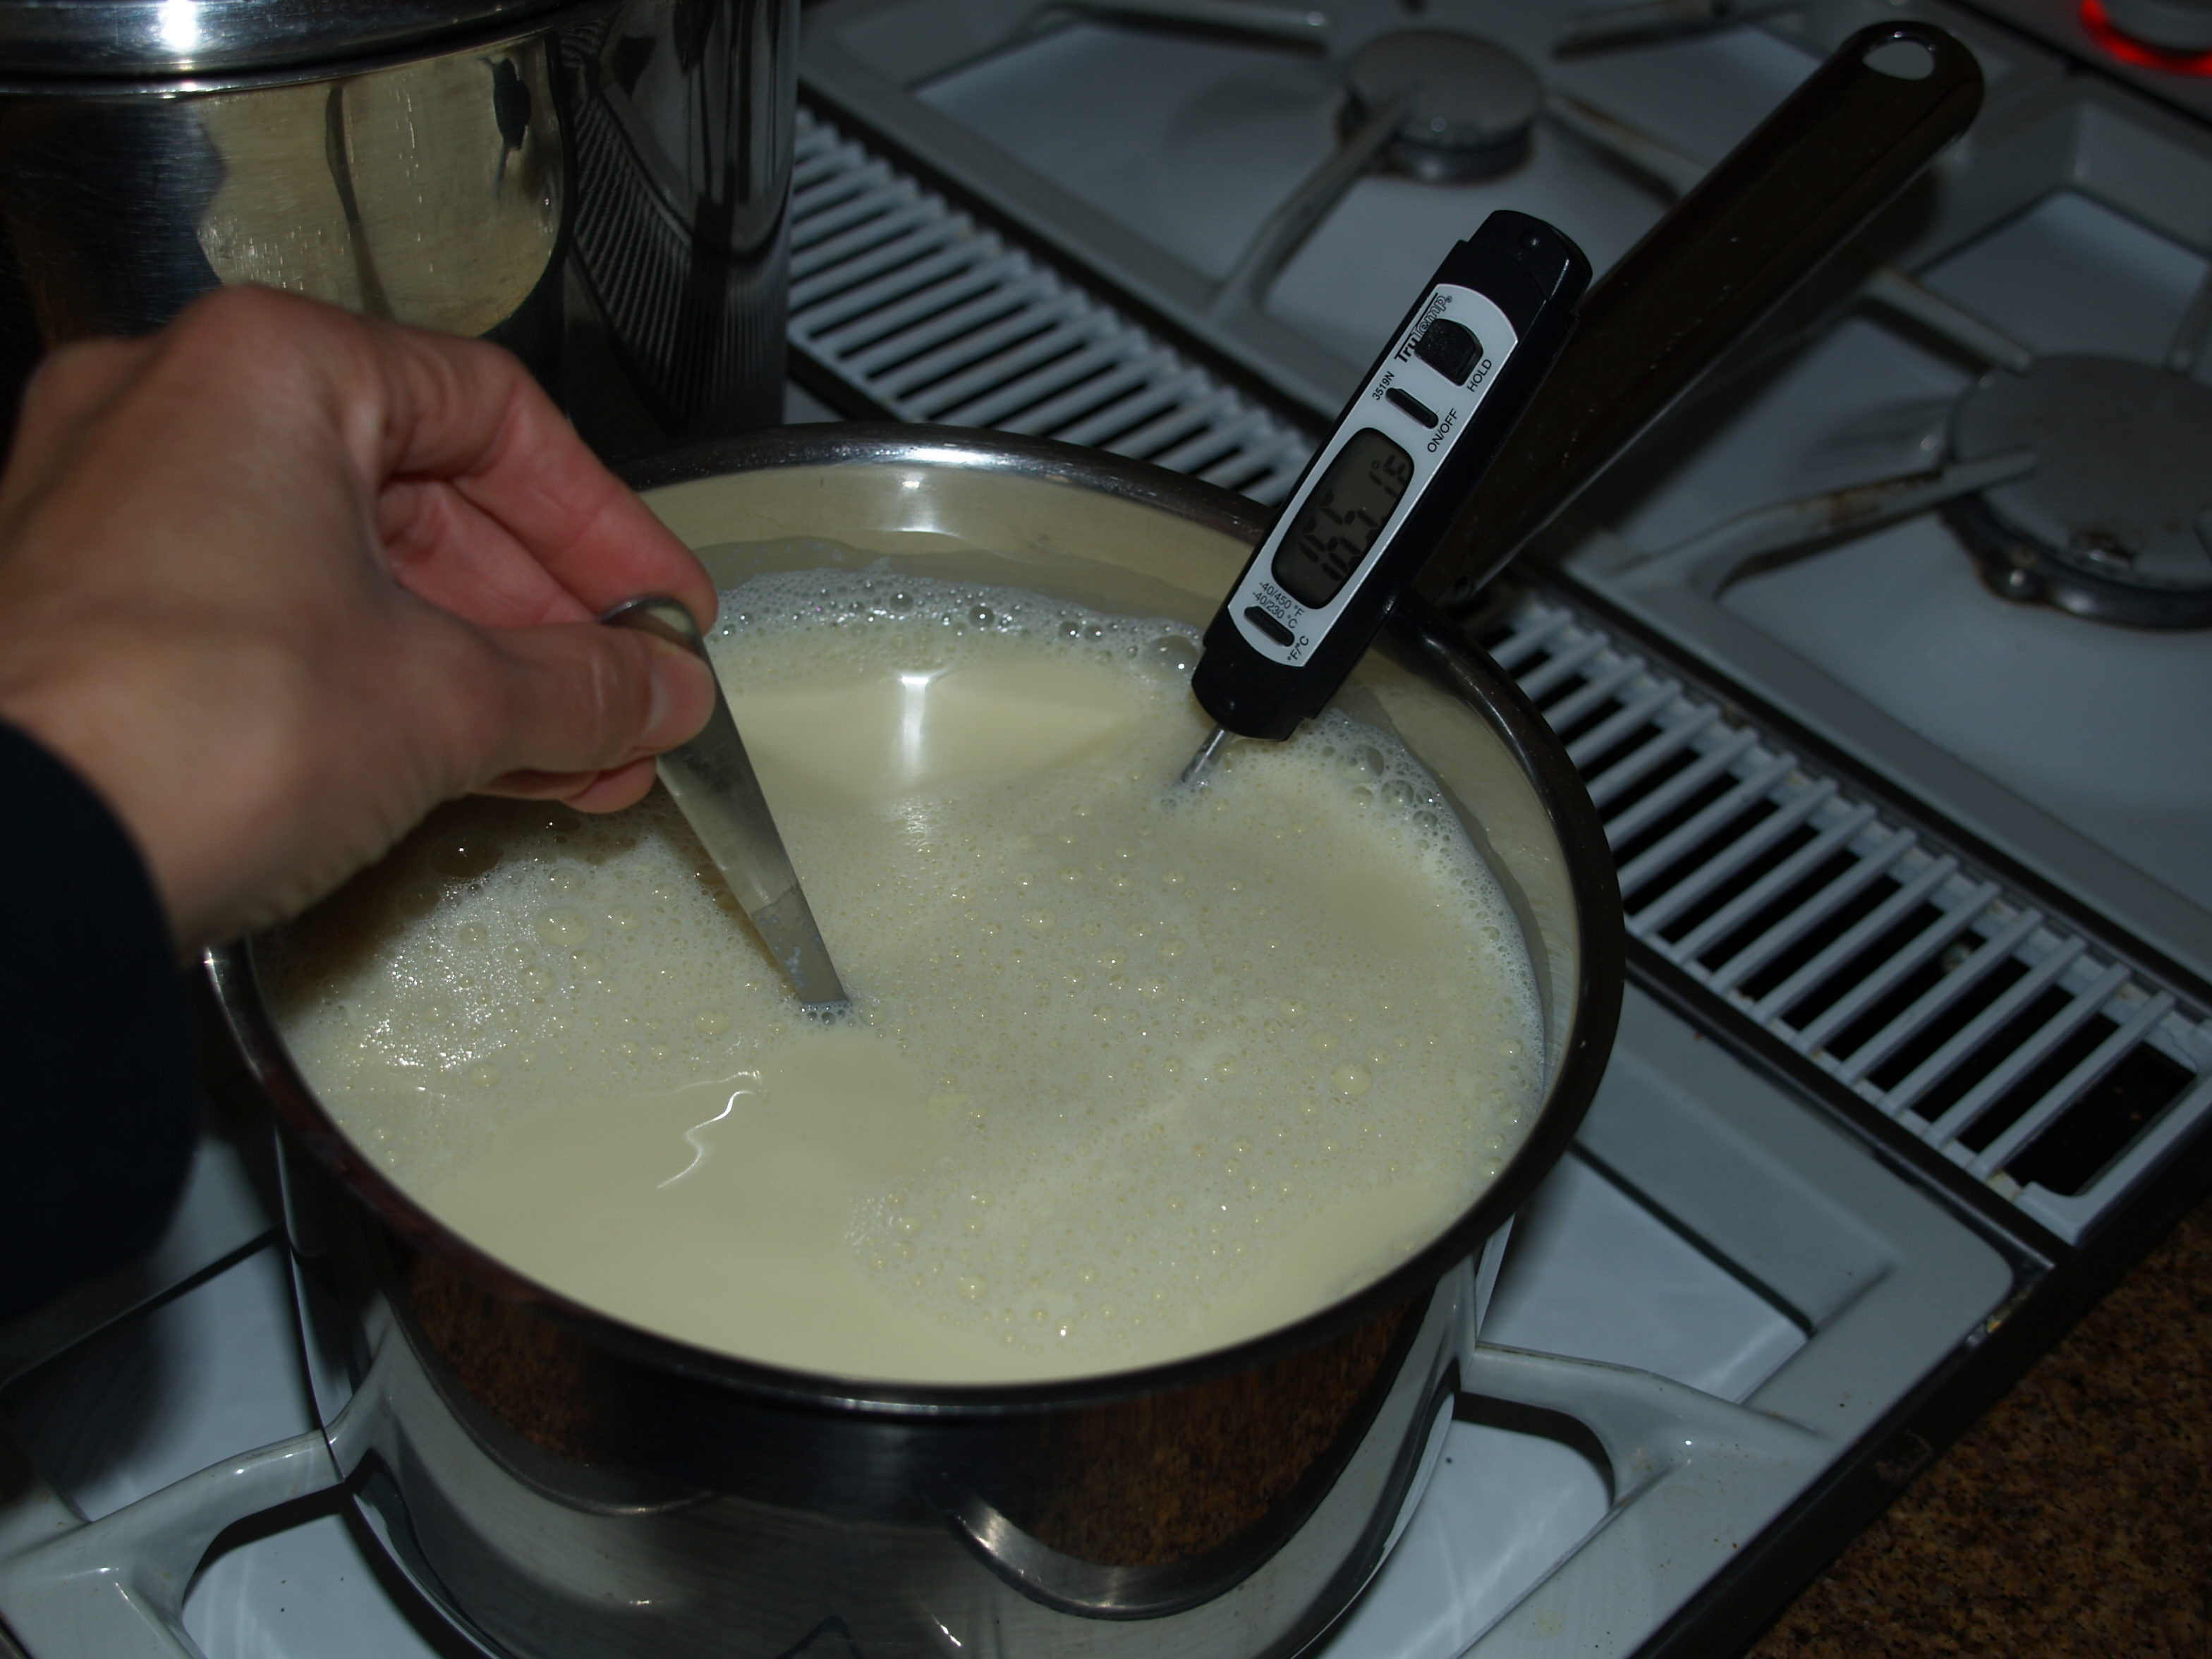
When the second batch is strained, you will need to re-heat all your milk before adding coagulant. A 3-qt pot at a minimum is needed to hold both batches of milk. Insert the kitchen thermometer.
Get the tofu press ready. Place it in large flat container (like a baking casserole dish) that will catch whey, the liquid byproduct. Don’t send the whey down your city drain! Water plants with it instead– it’s loaded with bio-ready nutrients.
(I use the sink here since our septic water get puts right back on our property.)
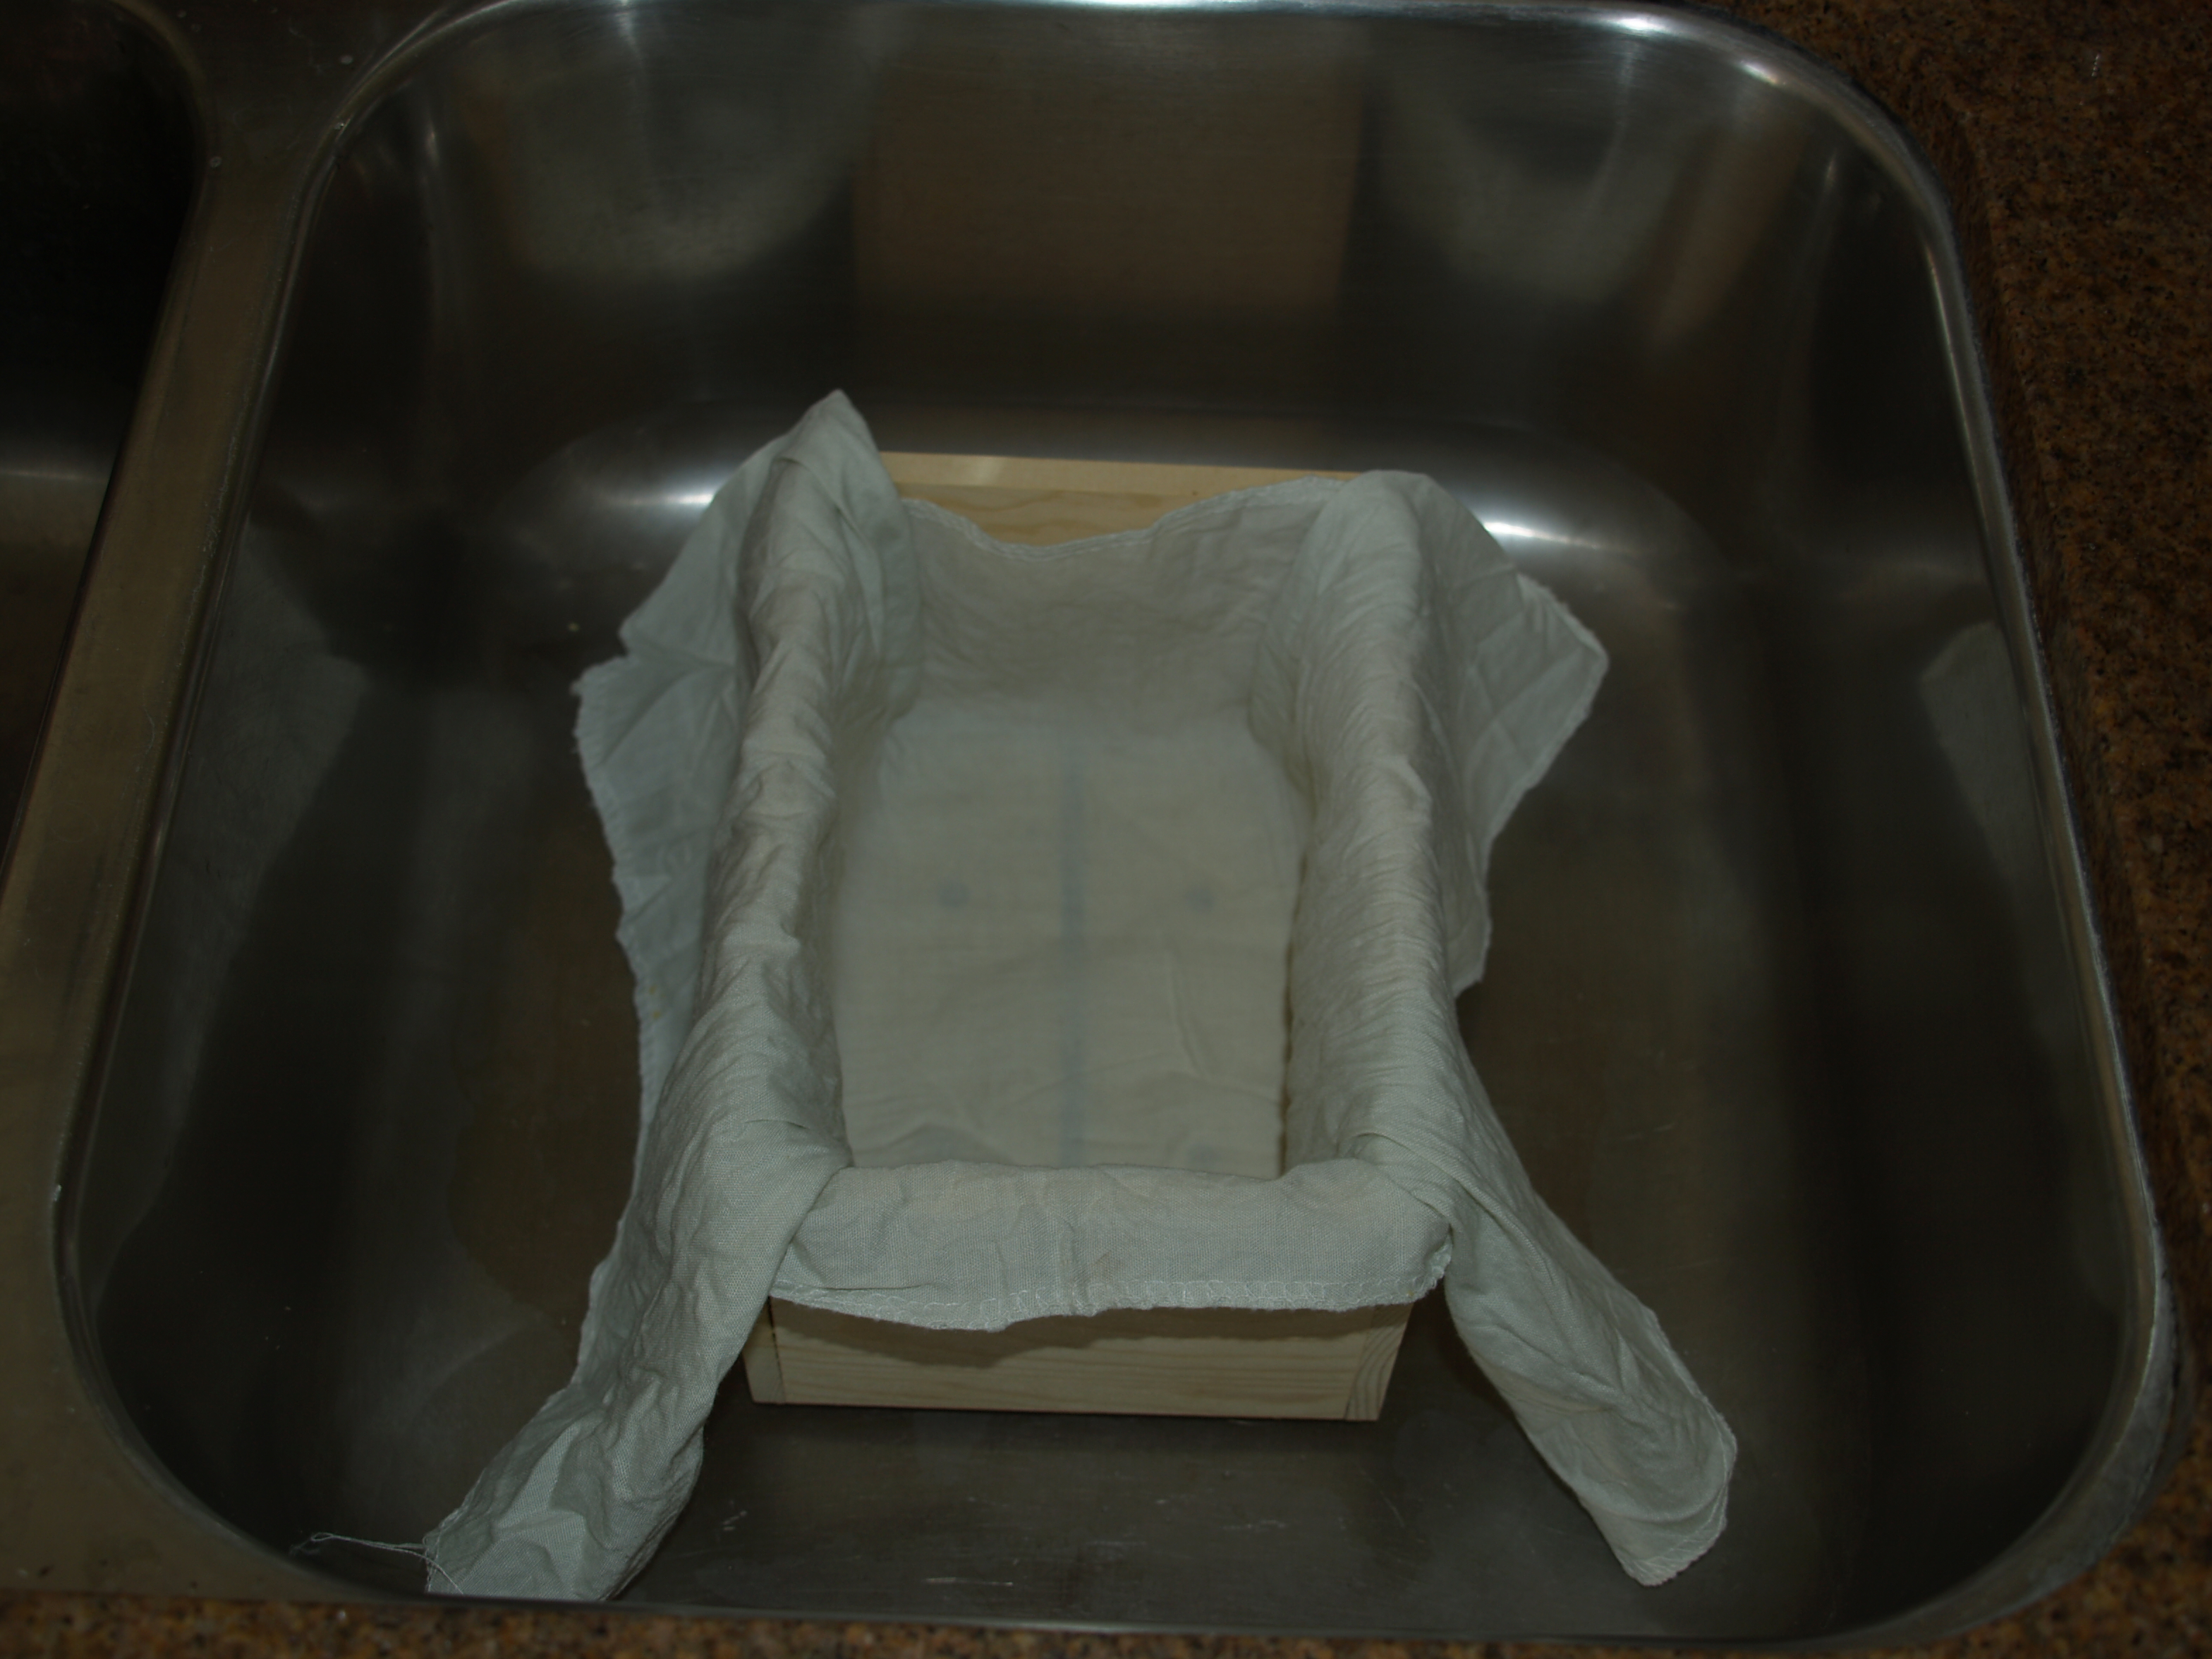
Ready the nigari (magnesium chloride), the coagulant used for curdling soy milk. A bag of it comes with the tofu press which lasts a long time. More nigari, more firm. Less nigari, less firm. I measure out 1 tsp into a cup of warm water since this will be a firm tofu cake.

Slowly re-heat the milk to 180 degrees. The protein will not coagulate properly if the temperature is too low or too high, and this temperature is optimum.

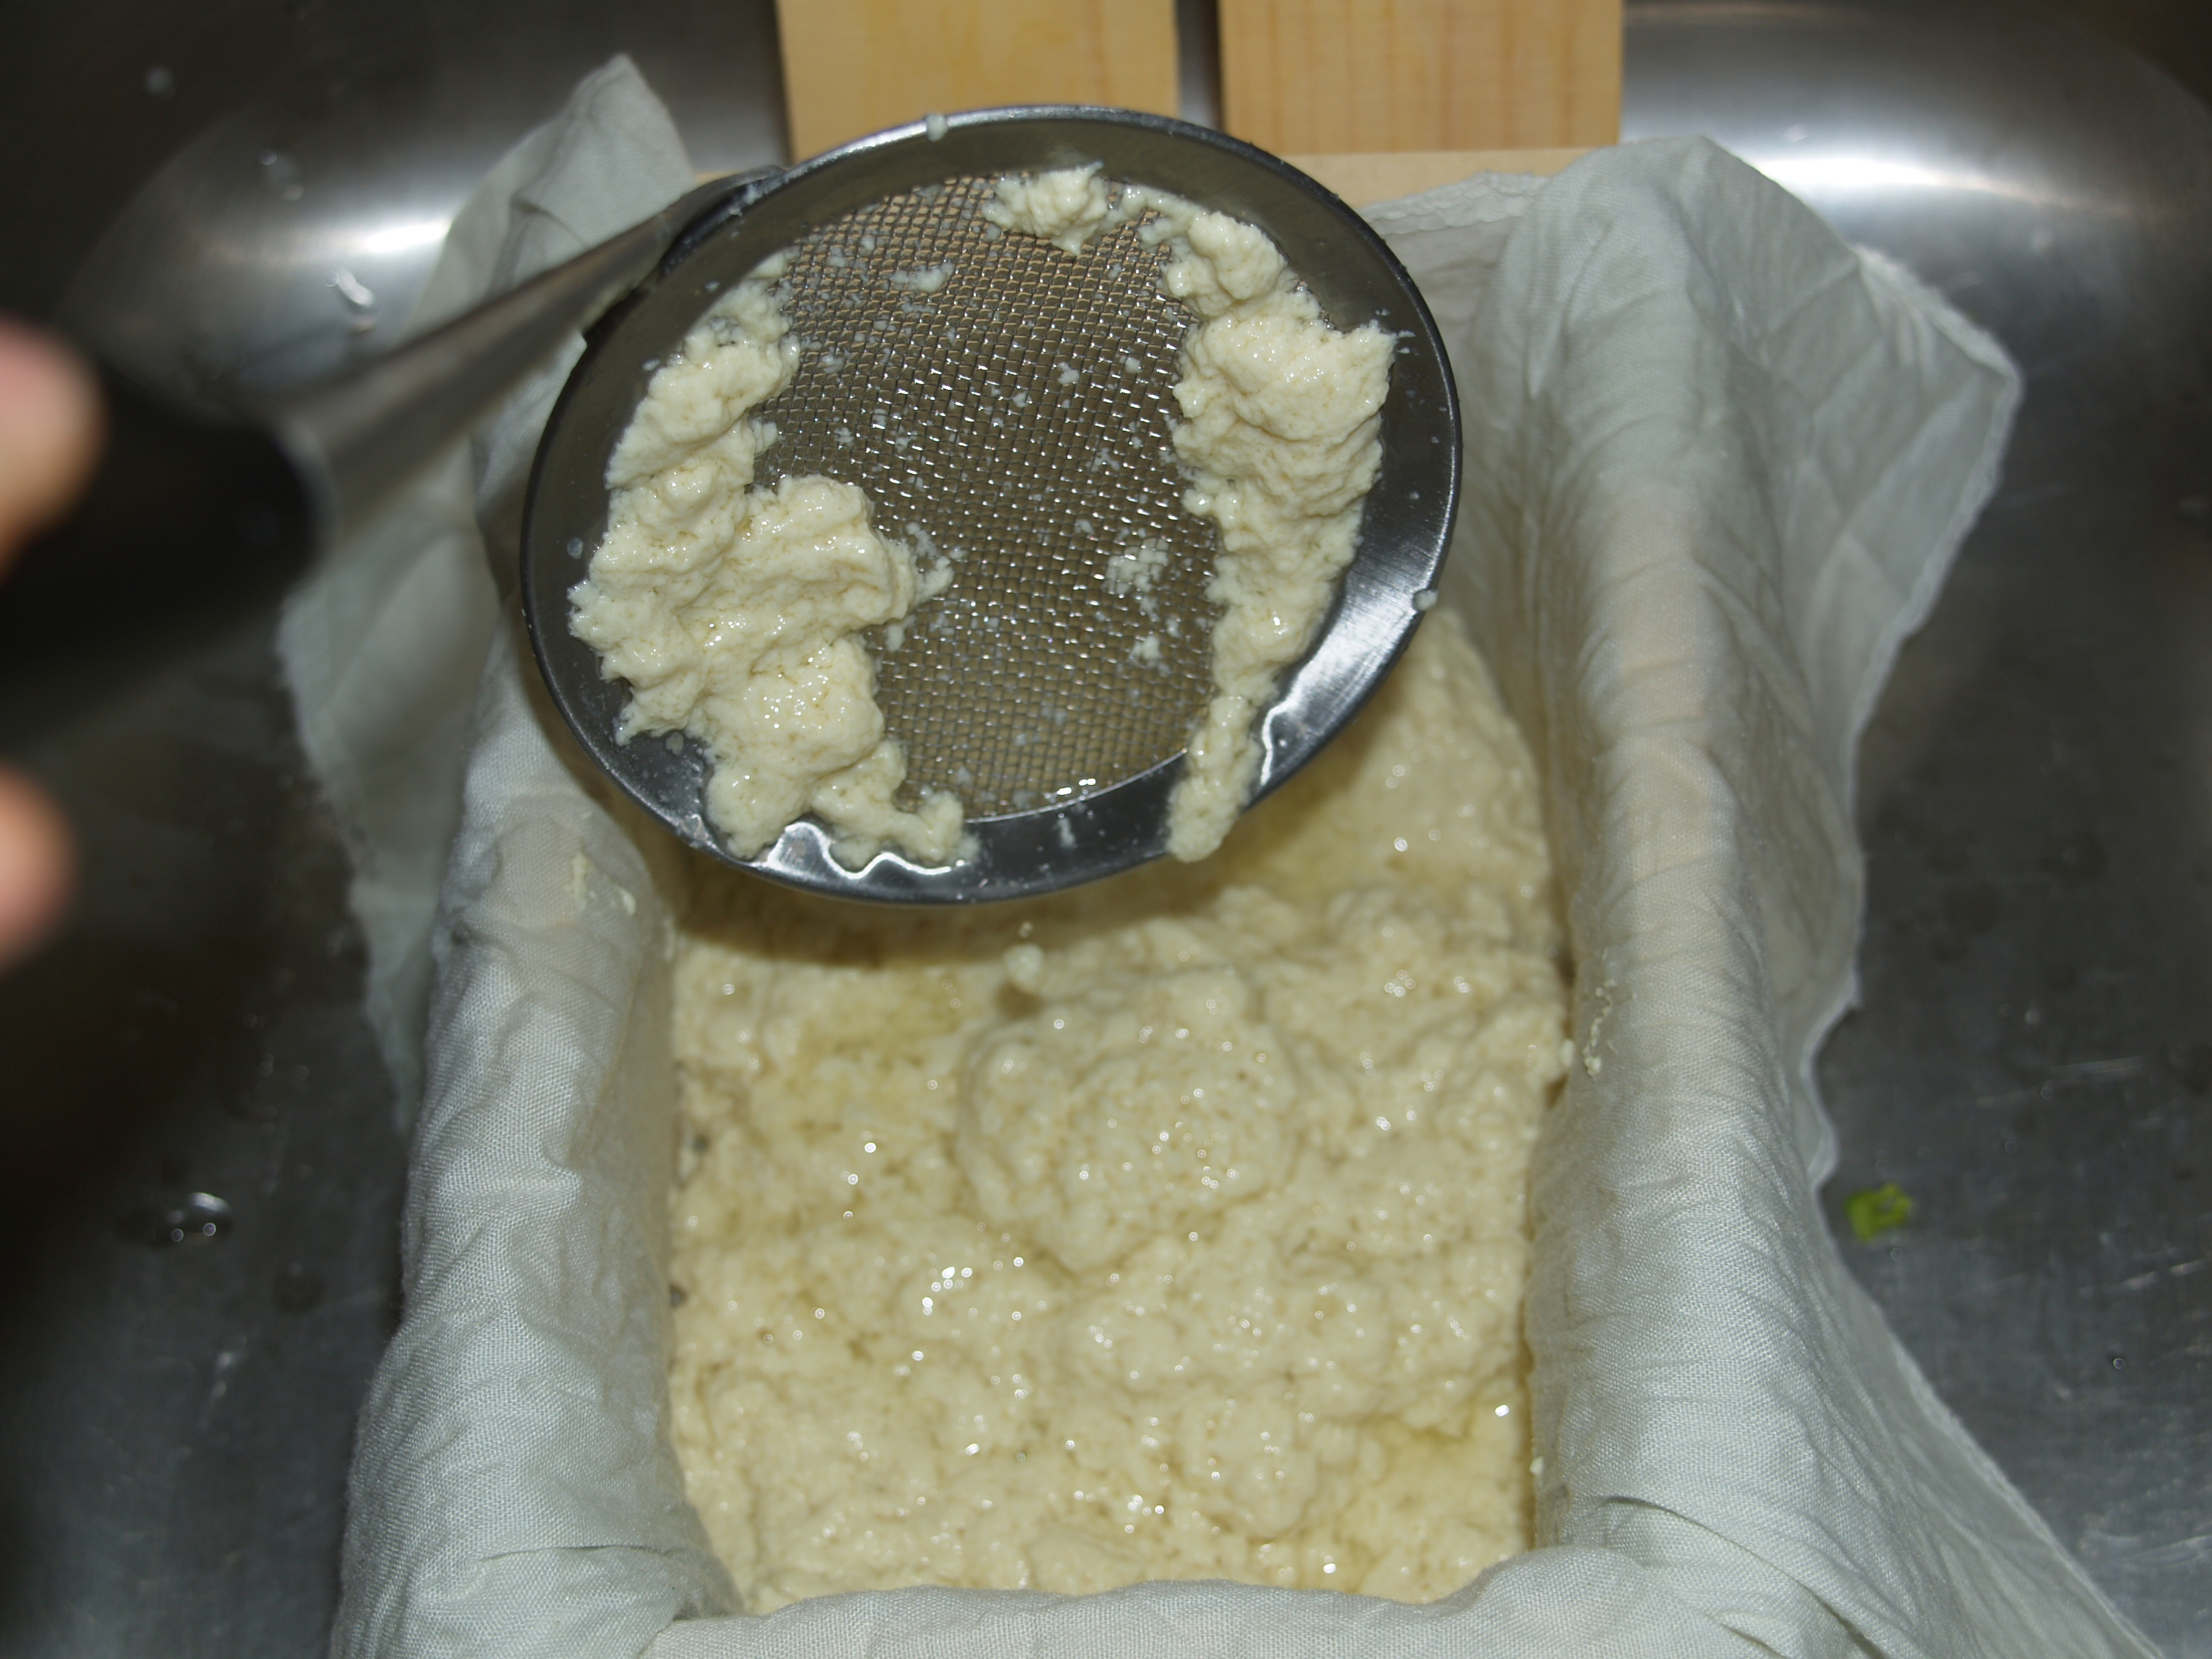
Stir in 3/4 of the nigari liquid solution and turn off the heat. Stir gently and allow some curds to form. Wait a couple of minutes…you’ll notice the curds separating from the whey. When this happens, pour the remaining 1/4 nigari solution into the milky whey remaining at the top of the pot, finishing it off. The curds should now be fully formed floating in a vat of liquid — and looking more like tofu!

With a spoon or sieve, transfer the curds into the cheesecloth-lined press. When most of the whey has leached out, fold the cheesecloth over the top, place the wooden lid on top, and place something with weight on top to continue pressing out the moisture.
It’s quite a bit like making cheese.
While this batch settles out, I begin prepping Black Bean and Okara burgers for the kids for lunch, using the okara from last week’s batch. This okara will be reserved to bulk up some healthed-up brownies.


I’m very impressed, Shannon, but it sounds too involved for me.
LikeLike
It’s really easy to do, Tanja. In fact, we’ve made milk from oats, soy, and almonds, and soy is still my go-to. In fact, I don’t even use the SoyaJoy anymore. I just use the stovetop and puree in the food processor. Quick!
LikeLiked by 1 person
I imagine once you get down the routine it’s relatively easy to substitute one ingredient for the other, but having to start from scratch does sound a little intimidating. I used to like milk substitutes but I have to admit that for the last several years my taste buds don’t appreciate them.
LikeLike
For those not intent upon eliminating cruelty upon others, sticking with the old way is definitely easier. For us, however, making milks / cheeses (that’s what tofu is) not only removes the exploitation of others from our dietary habit, it affords flexibility of a pantry good, flexibility and texture for vegetarian meals, all starting with a simple dried legume. Natures seeds are amazing!
LikeLike
Interesting. I didn’t realize that making soy milk requires so little soybeans.
LikeLike
Indeed. And dry beans are easy to store (just don’t get too many…there’s a shelf life). We make more fun things from the okara (the waste) than the milk, but milk for pancakes is a must!
LikeLiked by 1 person
I was so delighted to find this! I’m definitely going to give it a try and I’ll use it in the vegan quiche that I’m addicted to 🙂
LikeLike
If you buy nut milks in the store, you won’t BELIEVE how much money is saved. We use soy milk predominately for baking now (there’s a mean chocolate cake recipe here too http://wp.me/p28k6D-1nS) or mix with a bit of naturally sweet coconut milk for hot or cold cereals.
LikeLike
I switched to almond milk a few months ago and love it. Zero cholesterol.
LikeLike
We enjoy almond milk as well; it can also be made with the Soyajoy. At $2.50 per half gallon at the grocery, making it at home with bulk, raw almonds is very cost effective.
The nut husk (like the okara from the soy bean) can be used in baking as a filler, so it is essentially zero waste to boot! (The almond milk available here is stored in a TetraPak, which is difficult to recycle.) I was a Trash Girl waaaay before I was a Compassion Girl. Thanks, Bisogno, for coming back after all this time to comment!
LikeLike
Thanks for the info Shannon. I will probably continue to buy my almond milk which is non GMO and comes in recyclable containers. It sounds like fun to make, but I work long hours and am already making all my mother’s Sicilian delicacies from scratch (with the freshest, organic, locally grown produce I can find) for an extended family of seven!
I love dirtn kids and your philosophy on life and living. I really should comment more.
LikeLike
“Sicilian delicacies.” Mm. Makes me want to come over and crash dinner! I get the feeling we think alike on many issues, but even when we don’t I value your thoughtful comments.
LikeLike
A crash dinner sounds like fun!
LikeLike
Whoa… Wait, did you say vegan macaroons??!! Made or purchased? Details, please!
LikeLike
Look in Whole Foods refrigerated section (usually around all the fancy cheeses) for some fantastic vegan treats like macaroons and tarts. Be prepare to spend some $$…
LikeLike
Thank you for taking the time to share your experience. Yes, it is a metal container where water is heated to near boiling, and yes, that metal does get very hot. As I expected this, I place the container where it does not touch anything or otherwise can be knocked over by a child and unplug it promptly when it’s finished.
As for your #2, I will suggest that it is NEVER a good idea to leave a heating element completely unattended. It would be just as easy to burn a batch of cookies in the oven (perhaps even your house) if you got engaged with something else (TV, Facebook). I always stay in the vicinity when anything is “cooking” in the kitchen, timer or no. It’s a safety thing.
Each batch is made a liter (slightly more than a quart) at a time. I simply pour slightly more than a quart of water into the container with the proper amount of beans and don’t even look for the mark. You’re right: it’s tricky to see.
With four kids and a garden, and making some kind of nut milk or a block of tofu every few days, a convenience item was indeed needed to free up my time. The SoyaJoy certainly did that for me.
LikeLike
I am a bit impressed, which is English under statement for a whole lot impressed. 🙂
LikeLiked by 1 person
Great post. Love the step by step description and pictures. Looks so easy I might even try it. 🙂
LikeLike
Haha! If it wasn’t for you, I’d still be thinking it too much work to do myself. You are such an inspiration to me, in more ways than just tofu.
We make it slightly more than once a week, especially now that we have so many new vegan recipes to try (did you check out Somer’s laksa yet?) that use tofu as the filler. Not to mention all the wonderful ways to use okara (I got my book!)
http://vedgedout.com/2013/01/31/vegan-laksa/
Cheers, my friend. Don’t work too hard.
LikeLike
Oh, but I do love my loyal friends, even the ones who don’t eat tofu. Thanks for commenting and not using words like “blech” or “eeww” or other such descriptors. You’re the best, Bob! (That Scrabble reference was for you, you know.)
LikeLike
Wow. I did not know you could do this at home. Pretty cool.
LikeLike
I used to watch my girlfriends in Malaysia make soy and coconut milks — even made yogurt out of the soy milk. I remember it being a lot of work. This is just so much easier. We do it once a week, or more.
LikeLike
This was awesome. Well done, Shannon!
LikeLike
Hey girl! So glad you enjoyed it enough to break your bloggy hiatus to come by and say so. Miss you Darla. Now, get back to studying! (PS — soy milk making is so easy even the kids can do it.)
LikeLike
This is fantastic! Thanks for sharing this “how to”.
LikeLike
You’re welcome! Glad to share it. 🙂
LikeLike